Wednesday, November 20, 2013

It's Fall, Y'all!

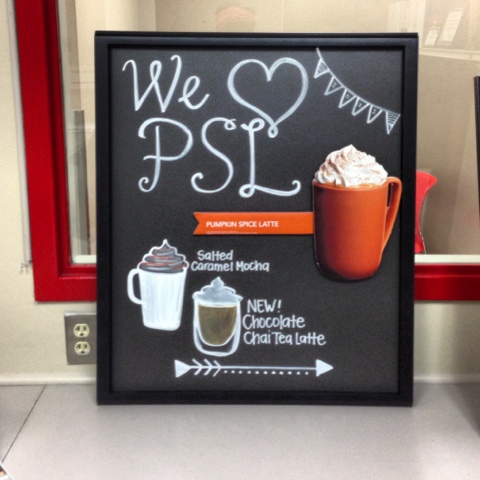
When fall first struck, and I say struck, because there are certain signs that the colder times are a coming. Girls break out their Ugg boots and skirts, wearing leggings as pants becomes socially acceptable, and Starbucks starts brewing their PSL (which I find horrendous.) Anyways...

It's FALL, Y'ALL!

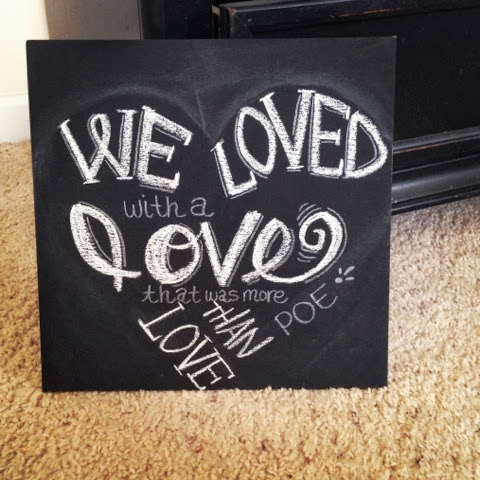
I saw that saying written on a chalkboard, and thought it was just too cute and clever, and then fall hit. In North Carolina. And I realized that this saying might as well be "bless her heart" because it's everywhere here. On signs, on garden flags, on cards, and I swear I saw an old woman with one of those wicked sweet vests with it embroidered on the back!

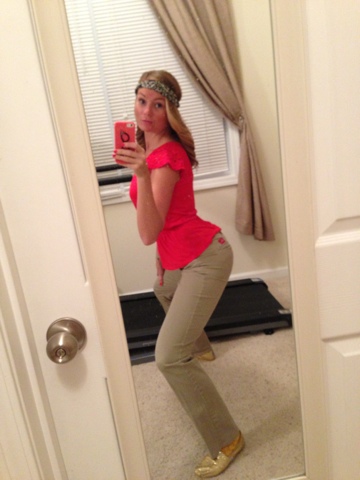
Seeing as how this is my first fall, I'll be all fall y'alled out, and just go with it! Here is where I have been lately. In between lesson plans, spending time in a classroom, and working like crazy, I've fit in some fun.

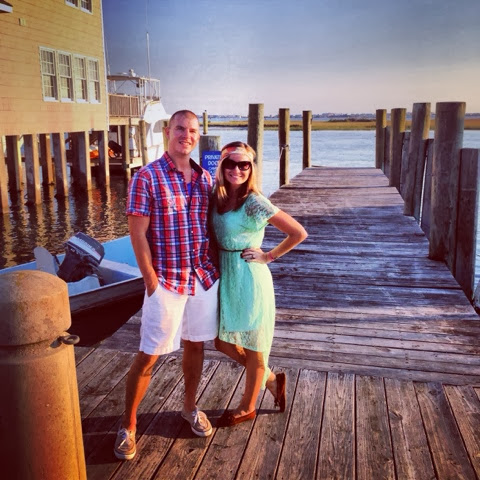
This fall, I went to my first Mumfest! Mumfest is an adorable festival they have in Downtown New Bern with rides, food, your basic fair stuff. I went with some friends on the last day, and it was such a cute little festival.

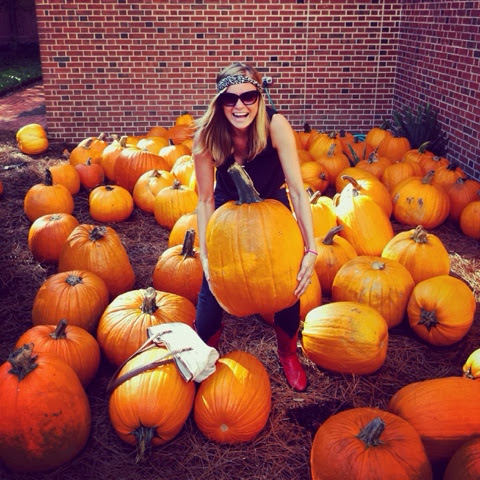
That picture below was actually taken in a graveyard inside of a church. There is the most beautiful church in DTNB that has a cemetery, and you'd think that people didn't even know it. To the left of me in this picture is a playground including a swing set, with a headstone about 8 feet away. Well on this day, it was a pumpkin patch with some of the largest pumpkins I've ever seen.


It started out as a beautiful day. The festival is right in historic NB, and I just love this Craven County Courthouse. They've been filming that show on Fox, Sleepy Hollow, here, and this is one of the buildings featured on the show.


It rained as we were leaving and we ended up walking right by one of my favorite homes.


We also went to the Seafood Festival in Morehead City to get our fat kid eating on. I wanted a funnel cake, and badly. I ended up eating: shrimp tacos, tasti-chips, and an entire funnel cake. It was amazing. I had a fun with my friends, and of course,  I went with my bestie, Dustin.
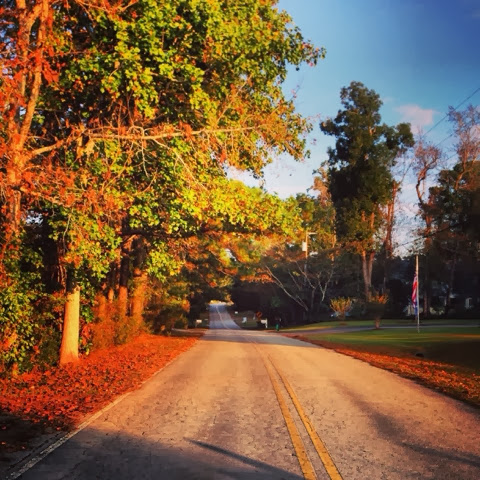

In my neighborhood. 


More of New Bern


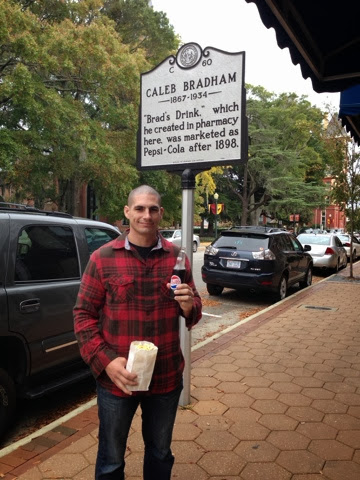
My husband was gone for 2 full months, all of September & October, so when he came home, we went out to do some exploring, and ended up at the Pepsi Store in NB. NB is known for Pepsi, so I couldn't believe we've never had a glass bottle Pepsi from there before. I'm acttuallllyyy a coke lover, but from the bottle, it was delicious! 


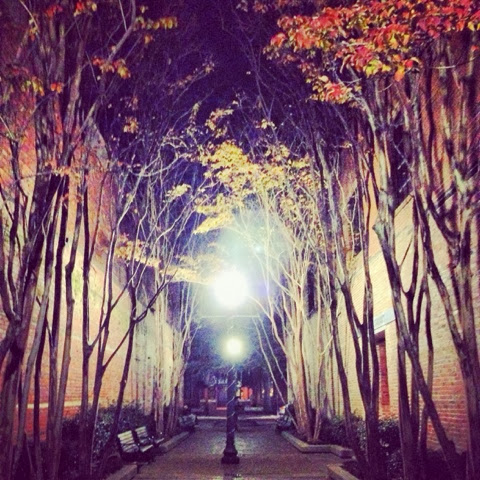
More of Downtown New Bern


We also celebrated the Marine Corps Birthday! 


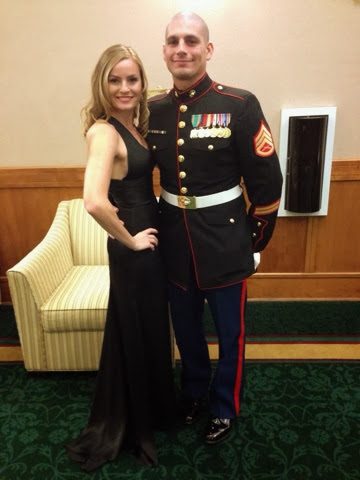
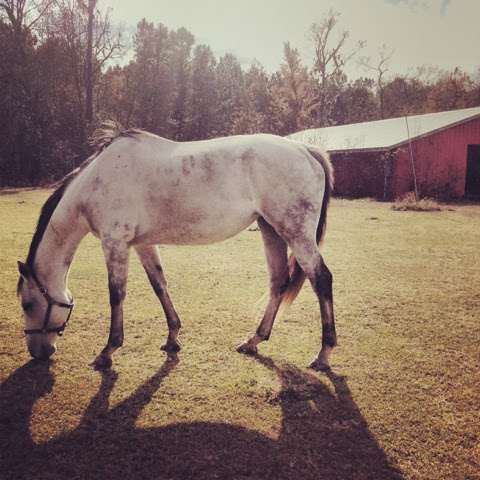
The day after the ball, we went to the next base over because I needed some new pants for work. We took some backroads way to get there, and there were tons of horses on these large empty properties, with no homes on them. On the way home, I wanted to go back that way, and screamed at my husband to stop when I saw a bunch of horses and what looked like no fence.

The fence was two pieces of wire, about 4 feet away from each other, so I crouched down and went right onto someone's property. I've never done more trespassing than in North Carolina, and people here probably have more guns than those in California. Anyways, I walked out and this white horse was probably about 30 feet away just looked at me. I held my hand out, and it came right on over to me, and put his nose in my hand. I think a lot of people must do what I did, because that horse was looking for a carrot. He was a sweet horse and let me pet him until he wandered away. (Sidenote, my husband was too afraid to go near it.)


I have two weeks left of school, so hopefully I'll get some time in for crafts and more updates!

Chalkboard Update

These past few months have been a whirlwind of school, my husband coming home, and getting cozy with the fall weather. I'll make a separate post about an update on me, but I'd love to share some of my chalkboards.

I'm full on obsessed. Here they are...


More Starbucks signs! They have the most amazing chalk markers that are a special brand I've never seen in the store! I've actually erased this one, and done 2 other ones since,  but they started sending cup templates so I don't have to draw the drink. Definitely not as cute or fun!


I'm creating an entire chalkboard wall in our bedroom. We have this huge wall with nothing on it, and of course I'm too cheap to buy any decor, so I am making it myself.


Here is my Thanksgiving window and mantel. I have to be honest, my heart wasn't in decorating this year because my husband was gone for the majority of the time, so it's a little pathetic. 


And this is my pride and joy! This was constructed with one piece of chalk and took me maybe 45 minutes? All this practice is making it easier! 

Sunday, October 20, 2013

Pyrex Love

I have a confession to make. Hi, my name is Elizabeth. And I'm addicted to collecting Pyrex.


ADDICTED. It's a good thing that I live in a rather secluded area where I can hit up the local antique stores in one day only, because had this obsession progressed the way it has recently when I was still in California, I'd be cruising Craigslist/Goodwills/Antique Stores daily.

I don't think people understand the obsession until you start collecting. How I started collecting was by frequenting the Long Beach Antique Flea Market, or as my family calls it, "the sale." The sale is amazing, it has anything and everything, and even a tranny or two. I think that sale has been going on for years, but I only started going to it about a year before I moved away from California. I miss that sale so much because it was a fun time for my family. We all went together, laughed, made fun of people and the things they were selling and got some good stuff and some great deals. After frequenting the sale multiple times, I kept seeing the same sort of dishes. I was originally attracted to the teal and white dishes, and after a few times of seeing them, I finally made my first purchase. The first dish I ever  bought was a divided snowflake blue casserole dish. I made my first purchase and couldn't stop. I started googling, searching, and wanted all the blue Pyrex.

After that initial purchase, the rest of history, as you can see below.

Pyrex Numbers

All Pyrex bowls have numbers on the bottom of them. There will be a three digit number that classifies what it is, then it will also have what size (quarts, pints.) I completely ignore the sizing. I do not pay attention to it, I don't do sizing, it's SO much easier to look at what the three digit numbers are.

So.

Cinderella bowls will ALL start with the first two numbers being 44. The smallest mixing bowl will be classified as 1, then the second smallest one will be classified 2. So - the smallest Cinderella mixing bowl, of any print, will have on the bottom of it 441. This is how I know what I am missing. A full set of Cinderella bowls will be 441, 442, 443, 444.

The regular mixing bowls (with no handles) have the same sort of system, but start with 40, so 401, 402, 403, 404.

How I started figuring out what I was missing was creeping the website: Pyrex Love.  I go on this website, find the print I have, and then start checking numbers and making a list of what I have.

In order to help myself when I shop, I'm creating a list of everything I have here, and to also help anyone who wants to start collecting. I don't do math, and for some reason, the numbering system confused me.

Butterfly Gold 
1960s - 1970s

What I have:
Cinderella Mixing Bowl 441, 442
Mixing Bowls - 401, 402, 403, 404
Refrigerator Dishes 501, 502, 503
Loaf Dish 913 (this dish isn't supposed to have a lid)
Butter Dish - 72
Coffee Cups - 39
Casserole - 043 (not sure where this one belongs)
Cinderella Bake Serve Store Casserole Dishes - 471, 472, 473
Round Casserole Set - 475 (missing lid)
Margerine Holder - 75
Salt & Pepper Shakers 
Correlle Pitcher 


What I am Missing:
Cinderella Mixing Bowl 443, 444
Quart Round Casserole 664
8 Inch Baking Dish - 922
Cinderella Oval Casserole Dishes - 943, 945
Cinderella Oval Divided Dish - 963
Oblong Baking Pan - 933
Round Casserole Set - 474, 474, 475 (lid only)

I wrote this post literally three weeks ago, and haven't uploaded it until today, so there have been some additions!


Pyrex Primary Colors
1940s

Complete set!
Mixing Bowls - 401, 402, 403, 404
Refrigerator Dishes - 501, 502, 503
*This set should have the lids that have spacing in the middle. It shouldn't be lined completely.

Butterprint - Teal
1957
What I have:
Cinderella Bake and Serve Casseroles - 473
Cinderella Mixing Bowls - 441, 442, 443, 444
Mixing Bowl - 403
Refrigerator Dishes - 501, 502, 503
Refrigerator Dishes 502, 503
Round Casseroles - 473 (this number is found in 2 sets)


What I missing:
Cinderella Bake and Serve Store Casserole - 471 (white on turq & reverse), 472 (only white on turq), 473 (white on turq, but was offered both colors)
Turquoise Butter Dish - 32
Mixing Bowls 401, 402, 404
Refrigerator Dish - 501
Round Casseroles - 475

The entire Butterprint collection is:
Cinderella Bowls - 441, 442, 443, 444 (should alternate colors)
Mixing Bowls - 401, 402, 403, 404 (only in white)
Butter Dish - 32
Refrigerator Dishes - 501, 502, 503
Cinderella Bake and Serve Casserole Set - 471 (offered turq on white, and reverse), 472 (only white on turq), 473 (offered turq on white and reverse)
Round Casseroles - 473, 474, 475

Snowflake 
1957


Square Flowers
What I have:
Cinderella Round Casseroles 474, 475
Cinderella Oval Casserole Dish 973
Mixing Bowls 401, 402, 403, 404

What I am missing:
Cinderella Round Casseroles 474

Mushroom Print

I'm not collecting these ones, they were actually free with another purchase : ) 


Pink Daisy

What a horrible picture, I found this pink dish for cheap, and although I don't have anything pink, I do have an obsession with the divided dishes.


And here is the wholeeeeeeeeeee cabinet : ) 


Wednesday, September 18, 2013

Starbucks Chalkboards

Did you know I work? From emails I've been receiving from people, or comments about how I just have so much time to work on things, I don't think people realize that I work, go to school full time, and craft like a crazy lady. I make time to make beautiful things, because it's what I love.

Moving on...Where I work we have a Starbucks. I'm pretty sure you can all guess where I work,  but when I was hired I had to sign a piece of paper stating I will not talk about my job on social media because I'm Human Resources. Weird, right? So, I'm not stating where I work, I'm just talking about a sign that I made. Evasive right? ;)

Anyways, HR jobs are glorified interior decorator jobs. Replace table cloths, have pretty writing, write peoples names elegantly on various items. Seeing as how I loooooovvvvveeee chalkboards and writing, the Starbucks girls propositioned me to do their chalkboards for them.

Hi. My name is Elizabeth, and at one point, I was addicted to Starbucks. I went to Starbucks everyday for 2 years. True story. Anyways, I always loved to look at their chalkboards and wonder who the hell did them because they were fabulous. Well. Here is their secret! You receive a sort of planner that tells you what to put, and you're not supposed to deviate from the plan. Sad, right?

So, the Starbucks girl gave me this paper, and a chalkboard and I had to create. The pumpkin spice latte is actually cardboard and on a magnet, and so is the wording. So I had to recreate this below on a chalkboard...

The reference guide

I've mentioned before that I can pretty much copy anything. When I said that, I meant copy writing. Drawing, eh... The wording turned out cute I thought, but the drinks, they left a little something to be desired... I also did a little free styling because I just HAD to. Overall, I think it looks pretty good!


Anyways, fast forward to yesterday. I walked into the store and found that my chalkboard was down and missing in action. Nicholas Sparks was here signing copies of his new book, and they wanted to promote the book signing. I had to erase all my hard work and I had twenty minutes to come up with something. I do not create quickly, so I had a mild anxiety attack over a chalkboard. It could have been better, especially the drink names at the bottom, but I was in a time crunch! I was the happiest with how I wrote his name. I hope Nicky sees it and starts thinking about using this way to write his name in books! ;)

PS. That is some of Starbucks secret menu and it's DELICIOUS!


I saw one of his publishing agents take a picture of it and told me she was sending it to New York. I asked her if she was posting it online, and she said yes. She was from Grand Central Publishing, and they put it on Instagram and Twitter. I should have asked her to tag me! ;)


And on twitter! :) 


Unfortunately, I didn't accomplish my goal of getting a picture of me twerking behind Nicholas Sparks. But, luckily,  he lives here in New Bern, so there's always another day.


Tomorrow I get to erase the Nicholas Sparks chalkboard and create the pumpkin spice latte one, again! Wish me luck a second time around!

Sunday, September 8, 2013

I'm not a witch at all - Chalkboard Tutorial

Chalkboards are everywhere right now, and seeing as how I have an obsessive personality, I've started creating them and writing on them in mass quantities. If you remember from this post my dear seester put me to work when I went out to visit my family earlier last month. I should actually thank her for forcing me because she sparked my crafting bug once again!

Anyways, I've been googling, researching like crazy how these people do their chalkboards, and I've learned a lot these past few days. I thought that these people were just coming up with their own fonts, and creating like crazy. I'm sure there are people that do, but I need something to go off of.

Want to create this?


Here is what I did!
1. I went to dafont.com
2. I searched for a font, I know one that I like to use - it's called "chalk hand lettering"
3. I searched and selected "CHL" and then typed the word that I wanted, in this case it was "good witch" and "bad witch"
4. I took a screen shot of each word, so I did a screen shot of "good" and one of "witch."
5. I opened a word document and inserted my screen shot into the document.
6. I enlarged the picture and printed out the document to use as a reference guide.

Unfortunately, I do not do the thing where you can shade the letters with chalk, and then press it against the board like in this tutorial. I just don't want to waste ink, and I'll be narcissistic for a hot minute, my hand writing isn't too shabby.


Before I left California my sister had a friend who was getting new windows, and had all these old babies just lying around. I took all of them. I believe there were 12. Well I'm down to 8 now from various other projects, and I gave a few away.


I taped off the window completely so that none of my chalkboard paint would seep through. This is the chalkboard spray paint I use. My husband doesn't use anything besides spray paint because apparently he mastered that technique. I'm not so good, but I think that since the chalkboard spray paint is already super thick, that it was easy to use.


I just sprayed lightly back and forth, for about 3 coats. It looks like it's uneven, but it's drying!


Here are the two templates I went with. Here are the templates if you want to use the same ones. 

I also use these markers from Michaels, but the thinner tipped ones. Also, if you make a mistake, fix it right then and there or else it's a little hard to erase. This is not a project that you can come back to later, you need to do it in one sitting.

I stuck it up on my mantel where it belongs halfway through to see if I liked it or not. I wasn't too sure how great of a job I was doing.


I finished and I actually enjoy it! I wish this wasn't a two paned window, but hey. It was free. What do you want, Gidgie? I'm enjoying it and looking at it right now. I'm already thinking of what to write for Thanksgiving and having a panic attack of having to erase it and recreate it next year!

Halloween Sign Tutorial

Happy Halloween! Oh! What's that? It's only September? Well well well. Let's break it down. There are 52 days until Halloween, and yes. I am already counting. I LOVE Halloween. You have to have some serious love for this holiday to create a countdown for the neighborhood children, right? I'm excited about Halloween this year because I'm in a new house! I'm also slightly nervous. You see, back at our old house in Oceanside, our little community was like something out of a movie on Halloween. There were kids everywhere. Mobs of them, and I secretly think that kids would get dropped off in our neighborhood because the knew the lady that lived at 714 Morse was hooking kids up with candy. Last year my husband acquired some full sized candy bars from the baby recruits who go through boot camp, and I handed out full sized candy bars (we had a huge moving box full of them) and went through $100 in candy, and we had to turn our light out because we ran out! See, INTENSE!

I'm eager to see how a North Carolina Halloween compares to a California one...

My sister sent me a picture of this exact sign last month, along with the blog. See, this isn't just something you can fetch from a Hobby Lobby, I mean a Home Goods, I mean from someone on the side of the road. You've got to see this tutorial first. ;) And here is the blog of the girl who made that sign, she's adorable!

 I did things a little different than her, and I actually have the words for the stencil that you can download if you want them.

What you need:
-Wood (1x4 in this tutorial) however big you want it, you can click on the tutorial link above for more specific wood instructions
-Black, Orange, Yellow, and White Acrylic Paint
-Teeny Paint brushes
-Washi tape (to hold stencils on the wood)
-Wood Glue
-2 Chalkboards
-Printer


Step One:
The first thing I did was take advantage of the week of leave my husband had. I texted him a picture of the sign from work along with one word, "Puhlease?" and when I pulled up in front of our house 4 hours later, I found him waiting for me with our dog upfront and this bad boy. God bless him!

He used 1x4s and cut them at varying lengths and nailed them to the two long poles you see at the bottom. It was very sort of haphazardly done (I didn't share the girls tutorial with him before this, whoops!) This one was rather large, but hey, we have a big lawn. I want peeps to see this from the street.


Step Two:
Print the stencils, cut and tape to the board.

Here are the templates - it takes you to a Scribd website - totally fine!
It's all about the candy stencil
Candy Stencil
Days Countdown Stencil


Step Three:
See how it looks. If you're going to spend an insane amount of time on a project, make sure it looks fabulous beforehand! I put hay under mine to hide the legs of the sign.


Step Four:
Cut out the words. This is how I got that beautiful writing! I only freehand with chalk - paint, not so much. I cut out everything and then trace it with pencil and paint the lines with teeny brushes.


Don't forget to do those candy corns first!


Step Five:
Use wood glue to attach the chalkboards


Step Six:
Put one of your best friends in front of it to model.


Step Seven:
Question the four hours you spent making the sign, and realize that you're bad ass in that headband, like Brett Michaels.


Step Eight:
Hang out with your wang out. DISPLAY!!!!!


Please let me know if you have any questions! On a difficulty level, I'd say this is a 3. If you can cut and trace, and don't have shaky hands, it's SUPER easy!
: )