Wednesday, April 24, 2013

Sewing Room Tour

One of my best girlfriends is coming out here this weekend to have a sewathon, and I couldn't be more excited! Of course I had to organize my entire sewing room for the big event, so I thought it was a perfect opportunity to share my sewing space with you all. I get a lot of questions from friends about my sewing room. I think the fact that I'm a 25 year old active person always makes people question how I sit down and sew for so long. The truth is, I have so many projects, and so much stuff that I NEED a whole room dedicated to sewing. Sometimes I look around and wonder how much money I've invested into a hobby, but then I realize, a lot, if not most of my stuff, is second hand, was free, or thrifted. Some people may think it's tacky, but that's my style (yes tacky!), and it made my hobby affordable. :)

Anyways, I apologize for the quality of these photos, my sewing room is so damn bright that I couldn't take good pictures with my iPhone or real camera. The lighting is great for sewing, not so good for pictures, but you can still see what I have to offer.

--------
This blue peg board is from Home Depot, they come in brown, but I wanted my whole craft room to be red and teal, so I had the husband spray paint it for me. It is probably the handiest damn thing in my whole craft room. It sits right next to my sewing machine so I can easily turn and grab whatever I need. I saw the idea on Pinterest and copied it immediately, like usual.

Here is my gorgeous little sewing table and do you see what I mean about the light? I love having my machine right up against the window to watch the people walk buy, but it's extremely bright! Anyways, I got this sewing table at the Salvation Army back in California. It originally was one of those hideaway sewing tables that the sewing machine collapses into and the table folds up. When I saw it, it was an ugly dark chocolate poop of a color, and had a sewing machine in it. We convinced the Salvo manager to take out the sewing machine, and sell us the table for $20! HA! My husband had 2 months off at the time (lucky right!?) so he sanded this whole thing down for me, and painted it at as well. It also had a huge gap in the top from where the old sewing machine was, so we covered that with a piece of plywood in my cherry print fabric that was real and teal and slapped it in there for my sewing machine to sit on. I'm embarrassed to admit that it was my husbands idea to cover it with fabric. He's more creative than I thought!


I can't believe I've never posted a picture of my sewing machine before! Here it is! My mom got it for me for Christmas - 2011, and it's probably my most favorite gift I've ever received. This is a great beginner machine because of the drop in bobbin. I will never sew on a side loading bobbin machine, ever.


I bought this lamp for my old sewing room because it was a lot darker than the one I am in now. It's an old school sort of California hipster lamp, I love it! It really serves n purpose now, but it's a friendly reminder of "home."

At the Long Beach Flea Market, I bought two of these crates and hung them on the wall as shelves. They're neat, and I can't remember what vegetable they say on the side, but they have something branded into the wood.

I love this little display! The old Kerr jar full of wooden spools is one of my favorites, and I made a ton of those pin cushion holders once, which are very handy! I keep my quilting safety pins in them! I think my mom scored that Jessup ruler on ebay, and I love the colors and it ties in perfectly with the Singer button holer that is on the right.

Here is my sewing chair. This chair was acquired from my old office... We had an old set of chairs laying around, so I brought one home, had the husband sand it, paint it, and redid the seat cushion into my cherry blossom print. I have two of these old California pillows in my house, they are also from the Long Beach Antique Flea Market, and the guy who made them told me they were made from old tablecloths (or so he said, most of those people are full of shit I think.)


Here is my handy dandy Cricut holder! I know I don't talk about my Cricut that much, but I DO use it. I cut out a lot of letters with it, and solid prints! It's the most amazing tool, I swear. I'm thinking about spray painting some furniture legs and adding it to this, but I'm not sure about that yet...


I took this picture before I cleaned up this area, so please disregard the mess! EEK! I always judge people who post pictures of their filthy homes on IG or FB, and here I am putting my dirty laundry on blast. BUT this is my cutting table, and it's fucking amazing. Once again, it's from the Long Beach FM, and it's on castors so it moves around, and the top part is actually from an old desk at an elementary school. It was a steal for like $30! The bottom area is what I call my "to do" pile. I throw stuff down there that I need to do, but I hate seeing messes, so I like to try to hide them from my line of crafting vision...

If you want to quilt, and no gouge out your eyes, you WILL invest in one of these. I LOVE IT! I usually fold my fabric into thirds, and then slice away like a mad woman. You can seriously cut like 24 squares in 30 seconds. This is probably the best thing I ever ordered from Joanns.

This was my Grandma's hoosier cabinet that she kept her fabric in. My grandma was the ultimate sewer, quilter, crafter, you name it. Her crafts make my crafts look like I'm in Kindergarten gluing macaroni to construction paper. Before we moved, my grandpa gave me this cabinet and it's probably the most sacred piece in my sewing room. I was SO worried that it would get damaged in the move, and it's probably the only thing that came out unscathed.
Hoosier cabinets were for baking, so this was for where you stored your flour. There's STILL flour in this thing, and from time to time, it falls out of the sifter, so I just leave it there because it makes me smile.


I have fabric in both of the top cabinets, and all of the pull out drawers are full of scraps.


This is one of my moms favorite quotes, and also one of mine. If it wasn't so long, I'd probably have it tattoo'd on me by now. How I made this was by using stencils and acrylic paint. I could actually swipe it all off and do another quote if I wanted, and I love that it's temporary. I used a sponge brush over the letters and used glass markers to mark off some lines so that I knew where I was going.


Here is my little sewing decor wall. I love that little embroidery hoop that just has simple fabric in it. My husband painted me a picture of a sewing machine, so I still have one more piece to add!


And of course the babies also have a custom bed for them in my room. If I didn't have that, they would lay alllllll over anything I lay down on the ground to measure or cut.


And that is my tour! Hopefully next week I'll have pictures of what it looks like right now! Side by side sewing machines, coffee, and wine. Sounds like some FUN this weekend!

Sunday, April 21, 2013

DIY: Retro Bikini from no pattern

Let me start off by saying, I was born in the wrong decade. Don't get me wrong, I love my life now, and my iPhone, and couldn't imagine it any differently, but sometimes, I just wish I was a lady of the 50's. Everything was so classy then. Dressing up to go to the movies, going on a plane, dinner dates, powdering your nose. It was a beautiful time, and I'm always drawn to anything from that era. Pyrex, winged tipped oxfords, sweater guards, I love it all.

If you have a Pinterest account, you've no doubt come across those adorable pins for retro bikinis. I know I have. I always click on them with the desire to purchase the most adorable retro bathing suit, to find out that they seem to ALWAYS come with a $200 price tag. I've had an idea to make my own bathing suit in my head for some time. I didn't have a pattern, I hate patterns. My ass and hips aren't anywhere NEAR the same measurement. I am a petite person, but I can guarantee you that my ass is not, so patterns are so frustrating for me to work with.

I took a sewing class last year in Oceanside and the teacher encouraged us to go home, rip up our favorite outfits, and make a pattern out of them and recreate these garments. While I'm not down with ripping my favorite Bettie Page dresses apart, I was intrigued by the idea.

So, I decided to drive over a hour to the nearest legit fabric store, and dive into my project...

Here is everything that I did, with explanations which I hope encourage you to make your own!

Supplies Needed:
-1 full yard of bathing suit material (just to be safe! I did 1/2 a yard of two colors)
-1 full yard of bathing suit lining (it's usually in the same section, it's not pictured, but it's beige)
-4 buttons
-Large graph print paper from a fabric store (to make your pattern)

Step 1: Find your suit!
-So, this isn't my favorite bathing suit, it was one of the ones I own with the most coverage, and could untie. I did cut up another bathing suit, but this one had a nicer shape, so I went with this one.
-As you can see near the crotch area (hehe) there is an "+" this is where my crotch seam met the butt seam, it's also where it fits me directly in the middle of my nether regions, so I made that the "middle" of my bathing suit. This bathing suit is made up out of one piece, and I sewed it together at the sides. It's literally based on the idea of a diaper, doesn't that sound SO attractive!
-I measured myself from my nether regions up and decided that 12 inches was enough room for me to get a high waisted look. I wanted the bathing suit to hit me right below my belly button, but you can make it higher, it's just really up to you on what you'd like. So that's what the _ line at the top and bottom are, that is 12 inches from my middle area, to my stomach, and my back. (I'm about 5'3)

Step 2: Trace your bottoms
-I traced the bathing suit exactly, so I could see the shape of the bottoms. It looks like a giant diaper doesn't it?


Step 3: Measure your waist
-My waist is 26" so I made two 13 inch lines, one for the top, one for the bottom, this will be my waistband.


Step Four: Create YOUR bikini!
I just went with this and did what I thought was good. You'll notice, it's a little lopsided on the right, that's okay, with sewing, you can ALWAYS take things in. I made this a little larger than I thought I would wear because I'd rather have to make it smaller, than need it bigger.


Step Five: Cut your pattern out WITH SEAM ALLOWANCE
-I've gotten pretty good at eying what an inch is, so please allow yourself an inch, and measure if you have to! You do not want to sew close to the edges of a bathing suit, I'll explain why, but give yourself an inch, you can always trim the edges later!


Step Six: Cut out your bikini bottom fabric
-I'm always worried about making things too small because I did that once with a custom skirt, so I'm forever haunted. You'll notice, I cut the bikini material from the pattern, then the lining is from the bikini material...


Step 7: Cut out your lining
-Unless you want to be rockin' a MEAN OLD camel toe at the beach, you NEED lining. Use your bikini material as the pattern for this one so it comes out evenly.


Step 8: Pin lining and Bikini Bottom together
-So, with the right sides of the fabric facing each other, sew along all four sides of the material, stopping close to any end so that you can turn it right side out.
-It's not pictured, but after I sewed around all sides, flipped it inside out, I stitched it closed, and then went around all the seams with a straight stitch, that's optional, I really don't think it did anything for my suit...I just wanted a more fancy trim.

Step 9: Sew
-ZIG ZAG, I'm pretty sure every basic machine comes with a zig zag stitch nowadays, I also used a special needle for sewing knits and stretches, you can find those in the needle section, but honestly, I think these are a gimmick!


Step 10 (Not Pictured) - Sew the sides together
-I sewed and re sewed these bottoms about 5 times to get them to where I wanted. Keep trying them on and pinning them to adjust the sizing, that's what makes them custom! Just sew the sides together (where your hips are) with the right side of fabric together to attach them together.
- I also sewed on the buttons, my pretty anchor ones were too small, but I'm happy that I had these other retro ones lying around to use.

Step 11:Find your top
-I wanted a bandeau style, so I pulled out one that fit well. Trace it out just like the bikini bottoms, don't forget your seam allowance!


Step 12: Cut out Bikini Top Fabric
-As you can see, I made mine into a sweetheart shape, I just wanted it to be a little more fitted than the one I had.


Step 13: Pin right side of bikini top and lining together
-Sew around the top and bottom (NOT THE SIDES)
-Optional - I bought bra cups, and put them in here to give my boobies some shape, I tried the top on without them, and it looked just fine, but I think the bra cups help keep it up.


Step 14: Creating Sides
-I didn't copy a pattern on this one. I just made it based on what I thought would look good. On the edges, this is the same width as the top, and the bottom is skinnier because I don't have a clasp, so I am going to tie it together.
- I sewed around three sides, turned it inside out, and sewed the end bit closed.
-Then I just attached it to the bra piece with the right sides facing together. (Like the bottoms)

annnddddd you're done! I didn't include directions on how to do the bow, because it's extremely easy, and if you have sewn anything, you've sewn a bow before, I'm sure! :)

My husband is in Florida for 3 weeks of training, so this is the best picture I could get by myself! : )
BAM!

And now I am sunbathing on our porch, refusing to take it off.


What I learned from making my own bikini.

1. Patience is a virtue. I wasn't kidding when I said I sewed these bottoms probably 5 times. What I mean is, that I kept making the crotch area smaller so that it didn't bunch up. I would go in about 1/4" every time, because I didn't want to make it too small. This was a great idea, because the final time I sewed it, if I would have done more than 1/4" it would have been too small in that area!

2. A one inch seam allowance is perfect! If you sew too close to the edges, with a zig zag stich on bathing suit material, it bunches. It's really hard to explain, but I played with the fabric before I sewed with it. If you've seen those scrunch bottom bikinis, that are sort of curly and wavey at the ends, that's what it does to the fabric when you sew close to the edges. By sewing close to the end of the seam, it won't lay flat, it will curl up at the ends.

3. Stretch the Fabric! I know that is going against every knit cardinal rule you've ever heard of, but it's true. This is NOT a knit material, if anything, this material is your ENEMY. If I didn't stretch the material when I was sewing, it would have taken over my sewing machine, and conquered my life! 

4. Don't give up! It was hard, but I stuck with it, and I am so happy with the results!


Thursday, April 18, 2013

Crafting strike ends in less than a week!

The weather here has been amazing. AAAAMAZING. I am a sun worshiper like no other, so everyday I slap on a bathing suit and bask in the glorious sunshine. I can't help it. I do wear a ton of sunscreen, and a hat now, so I'm not as chocolatey brown as I'd like to be, but I'll take what I can get. With this great weather, comes my crafting strike. When the weather is nice, I'm a total slacker. Why sit inside, when I could be outside getting my much needed Vitamin D!?!


SUP :)

and I always bring my co-pilot, safety first!


But, one of my BFFs Severina comes out here in less than a week, so I have lots of cleaning to do, and prep! I've linked her blog before, but you NEED to read it. I've never met a more fabulous, fierce person before in my life, and I honestly don't think North Carolina is ready for her!

In preparation for her visit, I decided to make a list of everything I plan on making while she is here to help myself get some ideas. I don't really want to start on a large project, but some small ones to knock out! Or so I'll tell myself now...

Idea Numero Uno: Reuseable Paper Towels
I go through so many papertowels at my house it actually makes me feel bad. I try to be a "green" person, and recycle everything, and buy enviornmentally friendly items, but I'm a papertowel hoarder. I'm determined to make these so I feel less guilty about my bad habit!

Number 2: Thrift Shop and Make Dresses
I have an old Doors t-shirt that I can totally picture, I want to do this so bad! We are definitely going thrifting while she is here! I really want to upcycle some old shirts into this idea, hopefully the people in NC gift these beauties to the goodwill so I have something to create! We WILL wear your granddads clothes, and we will look incredible! 


Number 3: Giant Vintage Star Quilt
I LOVE the blog that this tutorial is from, the blogger has the cutest fabrics, and she made a quilt out of vintage sheets entirely, which is a fabulous idea! I wanted to do this quilt for our extra bedroom, but I needed a larger one. Now that I want to have a quilt ladder to display all my hard work, I'm thinking about making this one to use around the house. You'd be surprised how much use I get out of these quilts. Seriously!

I also have a few other ideas that I can't post about, because they're a secret! ;)

Alright S, you're up, what do you have planned sista!?! I can't wait to see what you want to do!!!!

Thursday, April 11, 2013

Homemade Gifts

This past Christmas I decided to try and make all my own gifts, and definitely bit off more than I could chew. After sewing for days and days, I realized that the best decision is to make something AND buy something. I've had so many people ask me to make them a quilt, and while I'm extremely flattered that they'd like one from me, I don't think people realize how much work it takes. I know I didn't, that's for damn sure. I will get around to making quilts for all my friends and family members, someday, but right now, I think little homemade gifts will do! :)

Anyways, one of my very near and dear friends, Ramona, had a birthday this past month and I wanted to make her something special! Ramona is one of the best gift givers I've ever known. I always tease her and say that I'm just trying to live up to her gifts, because every gift I've ever received from her was AMAZINGLY perfect! Seriously. I need to know her secret to gift giving!

So this year I was a little stumped on what to get her! Her birthday was during March madness (quilting madness that is) when I made the quilt for my extra bedroom. So I was trying to make probably 4 gifts at once. So, we were texting one night, and her gift hit me! (I'm really not making up these epiphanies, they really do come out of left field.) See, Ramona is moving back to her home state of Texas and she just bought a house and we were texting about craft plans, and her gardening. I knew immediately what I wanted to do! So I ran to my sewing cabinet and scoured the fabrics. I bought some gray chevron fabric about a year ago now, and have been saving it for something special, and I knew Ramona's gift would be fab with this print.

So I made her a gardening apron to wear! I didn't follow any pattern, I just sort of went with it because I had something pictured in my mind, and it turned out fabulously if I don't say so myself!

I went to Target and found a pair of matching gloves and cute gardening tools. I also found some adorable copper colored herb markers and seeds. I placed the tools and gloves in the pockets of the apron and wrapped it up inside the apron, I wish I would have taken a picture of how I sent it off because it turned out perfectly! The apron strings were tied like a bow and my label was sitting perfectly on top!

Ramona loves it, and I couldn't be any happier! She is one of my best friends, and I miss her dearly! I can't wait to see what she does with her new home because I just know its going to be gorgeous!

Hope you enjoy the pictures of her fab gift!


Saturday, April 6, 2013

Guest Prep & Vacay Pictures

This is a little late of a post since my fam-damily was here visiting this past week! I was cleaning the house like a mad woman, and didn't get a chance to post my last minute decor ideas. Initially, I had a cleaning schedule planned, but then I decided to not even ask Dustin to help me clean, because it wouldn't be clean enough. You know HOW I know this? After he shaved his head, face, and god only knows what else in our extra bathroom, he came out with a wet towel in his hand and said, "Do you want me to knock out the bathroom, and just wipe it down?" God bless him. First, how is "wiping down a bathroom" sanitizing it?? AND sweet Mother Mary of God, how is wiping down a bathroom with a towel you just used to dry off your nether regions a good idea at all!??!? MEN. I hate to think of how the barracks on base are being cleaned if my husband was supposed to have taught marines all they know last year at boot camp. There's probably marines all across the country "knocking it out" and wiping down their entire rooms with wet, ball-sack ridden towels!!!

EEK....

Anyways, I cleaned my entire house, by myself, and little Guido hid upstairs in the F.R.O.G. waiting for my madness to end. You see, I can be a tad bit crazy when I clean. I like to quote my psycho father-in-law and claim that rooms are "closed." So once I've cleaned the kitchen, that shit is closed, don't even think about going in there for a snack or a glass of water. It's closed! I'm the cleaning nazi, honestly.

Anyways, here are some more pictures of our extra bedroom. The decorating is as good as it's going to get until I can devour another antique store. I really miss the Long Beach Antique Flea Market.


I have so many old suitcases lying around the house, so I decided to prop open this green one on the nightstand and fill it with stuff. I put my guest towels, their itinerary (yes, I know), and their welcome gifts. I made everyone mason jar cups, and mod-podged the tops with left over scraps from the quilt, so everyone got to take a piece of our home with them. I also recreated these mugs for them, so they have their own little NC souvenoir. My family is full of coffee drinkers, so the gifts were perfect!


We found this little shelf at a flea market in Murrieta, and I need to start collecting more teacups! It's hard out here because they sell them in sets, and I just want one!


This dresser was my dresser from high school! When I was in high school, my mom and I redid my room into a shabby chic type of room, and I painted my brown dresser green, and my closet for some random reason. I think originally I painted it with that crinkly white paint, and had an epic fail, and then decided to just paint it straight green. When we were moving my mom asked me if I wanted the dresser, and I said HELLS yes! I literally came up with all the decor and quilt on the fly, and it ended up not looking too shabby...chic!


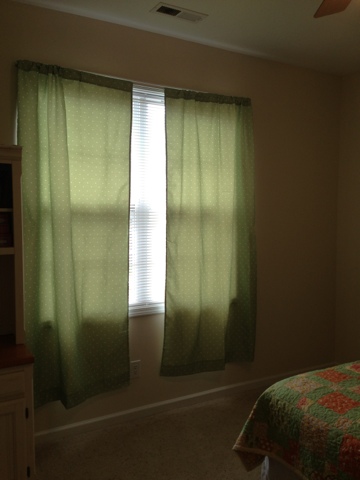
These curtains are hard to see, but they're actually a super cute sage green color, with polka dots! I've never had a curtain in my life, but all of our asshole neighbors leave their outside lights on at night, and they shine directly into our windows, so we sort of need them.

We took my family errrywhere while they were here. I was excited because even though I've been living here for 3 months, I really don't know much about the area still. We went into New Bern, and took a trolley tour, went to the cemetery, Tryon Palace, the whole sheebang.

Cedar Grove Cemetery - New Bern, North Carolina

We laughed our asses off while Dustin played the guitar.


Tryon Palace with my favorite (shhh don't tell anyone) cousin Amanda

New Bern has 52 of these bear statues! We only conquered 6 of the 52, but when my girlfran Sevi comes out, we are going for all 52!!!


The Old Burial Ground - Beaufort, North Carolina
Google this place, AMAZING

I also hit up some antique stores with my mom and Aunt, and look what I got! I'm smitten! I have been eyeing some Pyrex/Corelle plates for far too long on Etsy, and I picked these boys up at the antique store, and my mom swooped in and got them for me. They're the beginning of my soon to be new plate collection. I really want to switch over all my plates and bowls to these!


I also found what could quite possibly be known as the best looking quilt of my life. This thing is in PERFECT shape, and the backing is white. It looks like it was for maybe a girls twin bed, so how it stayed pristine after all these years is beyond me. It's gorgeous, it's perfect, I love it! Thanks mom!!

My aunt told me an idea about getting an old ladder to hang my quilts on display, and I think that's a fab idea! I've also decided to recreate any quilt I buy, so I'm going to attempt to make this quilt this year. It's on my list with all my other projects!


That's it for now, for a while! I am going on crafting strike! Haha! But no, seriously, I have a few more projects up my sleeve, but I need to plan them out and get some fabric. I've also got a few baby projects to make for friends, WINK WINK WINK. You biotches know who you are!