Showing posts with label diy. Show all posts

Wednesday, November 20, 2013

Chalkboard Update

These past few months have been a whirlwind of school, my husband coming home, and getting cozy with the fall weather. I'll make a separate post about an update on me, but I'd love to share some of my chalkboards.

I'm full on obsessed. Here they are...


More Starbucks signs! They have the most amazing chalk markers that are a special brand I've never seen in the store! I've actually erased this one, and done 2 other ones since,  but they started sending cup templates so I don't have to draw the drink. Definitely not as cute or fun!


I'm creating an entire chalkboard wall in our bedroom. We have this huge wall with nothing on it, and of course I'm too cheap to buy any decor, so I am making it myself.


Here is my Thanksgiving window and mantel. I have to be honest, my heart wasn't in decorating this year because my husband was gone for the majority of the time, so it's a little pathetic. 


And this is my pride and joy! This was constructed with one piece of chalk and took me maybe 45 minutes? All this practice is making it easier! 

Saturday, March 30, 2013

Spring has sprung! Outdoor space revamp.

Nicer weather has finally arrived in North Carolina! One of my favorite things about our new home is the screened in porch. Coming from California, I thought that screened in porches were the epitome of southern living. Random side note, in California, all the southerners I knew would set up shop in their garages. Seriously. They'd have couches, tables, BBQs, and would almost set up a second living room in their garage. It makes total sense to me now, they were just looking for their screened in porch! That has to be the reason because I haven't seen a single person in the dirty south hanging out in their garage like the people in California did...


So, this post is a little bit about a DIY gone wrong, but has a happy ending (no, not THAT kind of happy ending :) See, we have four chairs with seat cushions and back cushions, that looked like this...

Gross right? We bought this patio set at Lowe's probably 4 years ago when we moved off base and into our little beach house. We wanted an outdoor space and paid a hefty penny for this set. I'm disturbed, shocked, and disgusted with how much outdoor patio sets can cost. Even the ghetto ones from Wal-Mart are expensive! Anyways, we left them outside, year round, for 4 years. I'm pissed at myself for letting this happen.

Anyways, what had happened wasssss, I had an idea to just remove the old covers, dye them a darker green, and slap them back on, and laugh at how much replacement cushions would have cost me.

Well, I def messed up, two things:

1. I thought the cushions had zippers, they didn't. I know. I know. I should have looked before I left the house, but this epiphany came to me in the middle of the laundry section of the store, and I just went with it.
2. The covers didn't dye. I'm an idiot. Patio furniture cushions are waterproof, AKA they ain't soaking up shit, Tina!

So, there was I was. With all these chairs, and all these cushion insides taking up valuable real estate on my porch, and no cushions. If you've ever looked at replacement cushions, you know those can be pricey. For instance, the ones I wanted, and didn't even like that much, would have been $300 after all was said and done. Yeah, screw that.


So, I was walking around the store, and saw this rug, and the sky parted, and the angels starting singing, and I KNEW what I was going to. I grabbed this rug, and headed off to the sheet section. I ended up buying two King sized flat sheets in two colors, and came up with my replacement idea. See, since it's a screened in porch, I didn't need to have fancy water proof ish, that stuff isn't going to get wet. In a few years when we move back to California, and have had this set for probably over 7 years, I'll just get a new one. But, for now I needed a quick fix.

So,  I just reused all the old stuffing, which was like brand spanking new due to those fancy waterproof cushions! The old cushions were sewn insides out on three sides, turned to the right side, stuffed, and then sewn closed on the forth side. So, I just measured out the old pillows and cushions, and sewed my own.

As you can see, the dog loves them, that's his chair, but I thought that the chairs just looked too plain, that they needed a little throw pillow or two...


So, I had some leftover red from the pillows and canvas material laying around the house. I drew a paisley print on the canvas material with a pencil, and then went over it with some acrylic paint.


Then I pinned it wrong sides together with the sheets.


Cut it out, and sewed around three sides, turned it inside out, stuffed it, and then used this video tutorial on how to do a closing stitch. I think it's the best sewing tutorial I've ever seen.


Then I was happier with the outcome of the cushions! I think it just makes it look a little less homemade, and ties the colors together.

Here is the whole set! See that weird little metal thing? It's from the fireplace in the house, it vents onto the porch to heat the porch as well. Weird, right?

I'm pretty happy with how it turned out, overall it only cost me $30 to completely redo the cushions and create a happy new outdoor space area.

And last, but not least, who's the cutest cattle dog you've ever seen?
That's right Smokey.

Thursday, March 21, 2013

DIY Rustic Headboard

We recently bought an extra bed since my fam-damily is visiting, and I was disturbed at the prices of headboards and furniture sets. Half the stuff I saw was hideous, and the other half was all boat themed. For some reason here the decor and furniture is all shore themed, we even have a furniture store called "Shore Decor" here, YIKES! Personally, the whole nautical theme is overdone to me, and this is coming from a girl who has anchors in every room. ;)

So, I did some googling, talked it over with the husband, and came up with this bad boy, who only cost us a whopping $18.

Relax girlfran

And here's how you make it!

Supplies Needed:

-4 boards (Ours is 48 inches L, 24 inches H - boards are 48"x6")
-8 Screws & Electric Screwdriver
-Scrap wood to attach to the back (the picture later will make more sense
-Oil based stain of your choosing, I used this one - a true "barnwood" stain I think!
-Sponge for Stain
-Brush & Polystain (Optional)
-Gloves
-Circular Hooks for hanging (see picture)
-Gorilla Hooks

Step One:
Get your supplies. We bought everything at Lowes


Step 2:
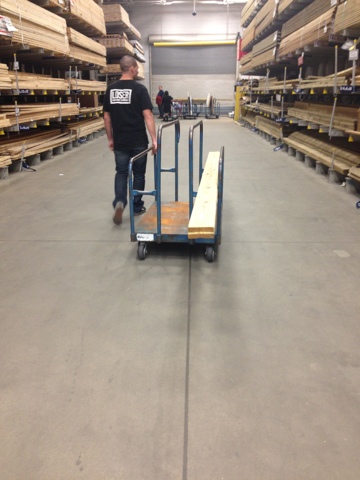
-Cut the boards, or get them cut at your local store. You can actually have Lowes cut your wood for you, which is why I didn't include a saw in the supplies needed, we have a saw, and in this case, we bought larger boards and had them cut into 3 at the store, and used the leftover ends for the backing.
-As you can see we have 4 boards because the bed in the picture is a full. If you want to make a headboard for a larger bed, just measure 1 inch on both sides, and adjust your measurements
-Each board is screwed in twice (once on each side) to the backwood pieces, I suggest using the black screws, I think they look better with the stain


Step 3: Distress Wood
-When you stain wood, you'll notice if there is an indent in the wood, or a scratch, it holds the stain darker, since I wanted a rustic look, we went to town on this board. As you can see, thats my lovely husband hitting the board with a military issued Kaa-bar. Yay Marines!
-You can use anything really, most people use a chain, but I didn't have one, so we used the metal end of a dog leash, a big long metal thing that turns the sprinklers on, and the kaa-bar.
-Go hog wild, and beat that board down.

Step 4: Stain
-Get your stain on.
-Staining is pretty simple to me, so I didn't take any progress pictures. You can see in this picture the sponge I used, and how I kept the stain all to one side of the sponge. Don't get that thing soaking wet, and always brush with the grain of the wood.
-I always stain the creases and then go back over
-The more stain you use, the darker it will be, if you like the stain I used, this is one coat of this

Step 5: Not Pictured
-Sanding and Polyurethane top coat (Optional)
-What had happened was, my husband left my paddle board directly next to my lovely project, and it fell over, knocked the can of stain, and it splashed onto the wood ruining my lovely headboard. I was so upset. So we tried to sand it out, and ended up loving the way it looked. You should always sand it slightly before the poly coat anyways, but if you want to do it exactly like me, just sand it pretty good in random places to get it more weathered.
-If you're the type of person that doesn't like the unfinished wood look, sand it slightly, and then apply a polyurethane base twice (directions on the product)

Step 6: Hanging
-Here is an example of the hooks we used, we hang everything in our house with those gorilla hooks. They're amazing, and bizarre. I think they used to be called Hercules hooks? Anyways, we have heavy windows, pallets, etc. etc. in our house, and they're all hung just like this! But be careful, studs in the walls are gorilla hooks enemy!


TA DA, You have a fab new headboard for cheap cheap cheap!

I hope you're digging those sheets and pillows as much as I am. I made the shams, quilt, and Relax pillows all myself. This is a handmade house!

Here are some closer up pictures of the stain, the wood, and how it looks hanging up against the bed.


I hung the wood slightly lower than the mattress top because I didn't want my guests banging their head on the wood above them.

Isn't this a beautiful stain?

I am so happy with the finished product, and it's only nearly 1 week until my family gets to experience it all. My older sister has been threatening me that she's taking my brand new quilt (which I've yet to blog about, sorry!) home with her! That quilt had over 10 hours of free motion quilting on it. It's never leaving my hands, ever! 

Sunday, March 10, 2013

Update - Whatcha Making?

I have been very busy lately, and unfortunately neglecting any and all pictures of my latest crafts. My family is coming to visit April 1, and I decided to make a quilt for the extra bed, and pillows, and curtains, and decorations...You catch my drift. Luckily, I've had an insane amount of energy. So enjoy the photos below...

Remember the Valentine's Day bunting flag I made? Well, I loved it so much, I made a St. Patty's Day one too.

I made my two little nephews dinosaur hoodies for Christmas, but not my older nephew because my sister and I weren't sure that he would like it. Well they both got dino hoodies, and my older nephew wanted one too! So I whipped out this bad boy and mailed it out there to him. I had to try it on before I sent it because I was considering keeping it, I was really happy with how it turned out. I'm glad Luke loved it because he's a special little guy. He was my first nephew, and I called out his birthdate before he was born. I knew he was going to be born on Saint Patricks Day, I just knew it! 


Lukosaurus - I miss this little guy!

Oh and guess WHAT? Mama finished decorating the reading nook! FINALLY. I made this little chevron throw for that area because I actually do use it, and like to cuddle up with a blanket when I read. The quilt is quilted in a chevron pattern as well, so it's reversible. The back side, which I don't have a picture of, is a vintage floral sheet. 


When Hobby Lobby opened, they had a ton of that burlap chevron print. I saw they had a whole yard of this color in the remnants for $4!!! I swooped it up and made a pillow for my nook. You can also see the quilting of the chevron throw better in this picture.

And here are the fabrics I am using to make the extra bedroom quilt. That top piece is a vintage Monticello sheet. I have a whole set, SCORE! I'm using the flat sheet from this set as the backing to the quilt. It's looking pretty good. I'll post the finished product hopefully later this week because I've already assembled the top quilt!

I made this lovely cup at my craft group this week. Too cute right? I just want to have a backyard BBQ and serve lemonade in them! 

I've been feeling very productive lately because it feels like spring! Yesterday I took my husband out of the house for a run/bringing him to the house of pain. I've upped my mileage, so when we run 4 miles, it's like a cake walk. I ran last week with him and he nearly died, and we always sprint the last little bit to the car or the house, and he had his ass handed to him by me.

Anyways, I've been running through my neighborhood, and a few days ago I came across this weird driveway that looked like it went into the woods. Now, I've seen horror movies, I know not to go back there alone, so I waited until yesterday so I could run there with Dustin, and it was AMAZING. Isn't this just a beautiful picture? The light streaming in? The woods full of color? Spring people. SPRING!

So we were walking, and we came across this fence. Chained, barbed wire around the top? Yeah, we went in. Good thing I brought my phone with me because we found out we were actually crossing over into Cherry Point MCAS. Isn't that safe? I didn't take pictures of what was behind the gate because secretly I was afraid we were going to get into trouble. So we ran through a forest towards the water, and ended up on the Neuse River. I always say it's the "beach" because, we'll there is sand! It was so beautiful because it was like an untouched beach. I'm sure other people in our neighborhood know it's there, but do they have the balls to cross the fence? Probs not.

Today we are making a headboard, and I'm actually remembering to take pictures, so there will be a detailed tutorial of that soon! : ) 

Sunday, March 3, 2013

Hobby Lobby ain't got nothin' on this girl!

When I first found out I was moving to North Carolina, I was excited for crafting possibilities! In the south, they have Hobby Lobbys! Now, HL's are now slowly making their way out to California, but the nearest one to me was about an hour away when we still lived there.

So, we get our orders, I start googling everything that I love to see how close by it will be to our new house. And guess what I find out? There IS NO HOBBY LOBBY NEARBY. I was so sad. There wasn't even a Joanns, the nearest place that had fabric? Wallie World!! Which I hate and despise, and secretly sanitize my hands about 10 times when I am forced to go there. Fast forward to a few weeks later, and someone posted online that a Hobby Lobby was in fact opening near our new base. I was tap dancing on my table tops for weeks. Well, I found out about 3 months ago, and guess what?

Hobby Lobby opened last week!!!

If you've never been in a Hobby Lobby, try to think of it like if Michaels and Joanns had a threesome with Home Goods, and could produce offspring, that offspring would be Hobby Lobby. It has fabric, crafts, furniture, decor, etc. etc. It's seriously amazing, and seriously overwhelming. I forgot how hideous some of the stuff there can be. There is one aisle in particular that I've deemed "baby hooker" where everything is hot pink, zebra print, and feathery. Not cute.

Anyways, I went opening day, and bought a ton of stuff. I went up and down every aisle, and just liked to look around at what they had. One thing in particular, caught my eye. It was a piece of old wood that had some wrought iron decor mounted onto it. I seriously considered buying it for $100, but I thought, screw that, I can make that!

I wish I would have taken a picture of it, but it looked something like this:

Anyways, the husband came and found me just as I was pondering the metal decor, and I asked him if he thought that we could make something similar, and he said of course. That man is always up for a challenge, even a crafting challenge! So, we went through the metal aisle, and found one that we liked, and since it was their opening day sale, we got one 50% off and ended up spending an entire 7 dollars on this project!

On our way home, I was staring down the roads trying to find a good pallet. Weathered pallets are hard to find. Someone once told me they get theirs from the backs of stores, but those are just too new, too wood looking. So we are driving along the "freeway" here, and I see an abandoned field next to a church and scream for Guido to pull over.

We had hit the jackpot. There are old white picket fences, bricks, and various sizes of pallets that have been there for what seems like forever. We picked out an extra long one that I haven't seen before, usually they're pretty square, this was one totally rectangular. We grabbed it, and took off before the 5-0 showed up, because honestly, we have no idea whose property we were on.


We removed the pallets from their backing, and actually attached them to some leftover wood. To get the pallets off what originally holds them together, just hit them with a hammer against the opposite side. Usually they pop right off, this one was a little hard because it was seriously weathered.


We attached them to three different pieces of wood. Originally, I wanted to reuse the nails, but this wood was messed up, so we had to add some of our own screws into the new wood we had left over.


We hung up the pallet, and once we thought it looked level, we took it back down, and added the metal piece.

Finished Product

I am so happy with how it turned out. My house is already pretty much completely decorated, except for our master bedroom. No one goes in there but us, so there is literally nothing on the walls. This is the only thing on our walls right now. My mission is to spruce up that place! We have family visiting very soon, so I need to get my ass in gear!

Anyways, I hope you enjoyed my Hobby Lobby inspiration, not bad for only 7 dollas! 

Oh, deer...

Frankly my deer, I don't give a damn.

Oh how I wish there was a button that said that on Facebook. I'd be clicking it like a mad woman. Anyways, before we moved, I threw all my old bathroom stuff away, except for the framed picture I had, because I figured it could be a good project, someday. Fast forward to 6 months later, and it was still taking up valuable real estate in my craft closet, so I took it out and decided to do something with it.

I woke up this morning, put on my big girl crafting panties, and made THIS!
**The inside part of this frame (so not including the border) is 11.5"x11.5 because it was framed art, not a picture frame. So take that into consideration when you're buying an empty frame for your deer.

Oh what's that IG friends? You want me to make you one? Hahahhha. NOT. Make it yourself, by following these lovely directions below.

What you need:
-1/2 Yard Fabric - My favorite fabric for pillows and painting is Duck, it feels like a rough canvas material
-Paint of your choice - I used acrylic paint from Wallie World
-Printer, Scissors, Tape, Paint Brushes, and Pencil (only use a pencil if you're doing a dark color, for lighter colors, use that color in a fine tipped sharpie)
-Frame - Hobby Lobby has open frames, and if you buy just one item, you can check out with their weekly 40% off coupon
-Staple Gun


Step One: Download, print off, and cut out this template from yours truly. 

Step Two: Attach the template to the canvas with Washi Tape, 
and trace the template.
Washi tape is sort of like painters tape, it comes off so easily. They have it in the office supply section of Target, but you can use any tape. 
I use Washi tape because I keep all my templates.

Step Three: Paint & put a piece of printer paper under the fabric so you don't end up with that lovely blue stain like I have on my coffee table from another project.
 Get yourself some good brushes. My favorite ones are the straight angled smaller ones, I use those for the edges, and a teeny one that I used for the antlers.

Step Four: Replace the paper underneath the deer with a clean new piece, 
and let the deer dry completely. 
Paint will seep through, and if you leave the same piece of paper underneath, it will stick and when you remove it you'll be able to see it through your fabric.

Step Five: Attach to the back of your frame with a staple gun, 
then cut off extra material. 
It's okay to pull it taut, I did! Also, don't worry about how it looks on the back, no one sees behind your frames!

Step Six: Hang and enjoy! 
Please comment about how crooked that "W" is so that my loving husband will finally see that it IS crooked and rehang it. He doesn't believe it's crooked. He thinks the letters are crooked!!

This craft took maybe 30 minutes. If you're a little woodland creature lover like myself, it would be a great craft for a rainy day.

Happy Sunday! : ) 

Wednesday, January 30, 2013

Dwight, get out of my nook!

That's what she said! That's what she said! If you know what this is from, you get two thumbs up from this girl!

I, the librarians daughter, have created a reading nook. 

When we first looked at this house, I loved it, but I kept thinking, "What the hell am I going to do with THAT area?" "THAT area" was the formal dining room. I don't understand formal dining rooms. They must get used what, three times a year? I understand some people like big, giant dining room tables to sit and enjoy a meal with their family. But for me, I would get so much more use out of a reading nook. There is nothing more that I love in this world, than a good book. Okay... maybe Petey, but books are a close second, my husband is third. ;)

This reading nook opens up into our living room so I couldn't go too crazy with the color scheme. My living room is pretty dark, with reds, and burnt oranges, so I thought brown would be a great color in the nook, and then that vintagey mustard color to make it pop a bit. I am so happy with the results, here is a looksie!

The anchor pallet I made, finally found a home. I also made that pillow, I painted canvas and sewed it into a pillow. There will be a tutorial later because 
I'm making a few for friends.

Other side of the nook

Other side of the nook, my grandmothers sewing machine on display

I've mentioned this on my FB and Instagram, but my husband has challenged me to "30 Days of Vegan." We are going to give it a try the day after the SuperBowl because let's face it, I want to chow like a pig. So we are going to give it a shot, with one break for the weekend that we're visiting my brother and his family. If you know my brother, Ethan, you'll know he won't stand for fussy eating. If I told him I could only eat Vegan, I'd wake up with a chicken wing stuffed into my mouth while I was sleeping!

So, I tried this salsa recipe off Pinterest and sweet mother, Mary of God! It was so good!!! I made it yesterday, but let it sit overnight in this super cute 70s mushroom Pyrex dish, and I ate it with my husband tonight while I cooked some chili, soon to be vegetarian chili! The salsa is so good that I'm making two servings of it for the marines on Sunday. I bought all organic ingredients too! I finally found what I think is the North Carolina version of Whole Foods - Harris Teeter. It's my new favorite store, I've already been there twice this week and it's 25 minutes away... I also bought those bright raspberries in my red Pyrex dish there as well. I love that Pyrex dish, because well, three Asian ladies were at the flea market debating about buying it for 5 minutes, and then I finally swooped in and took them out from underneath their noses and bought them.

I was making my Target list today, and fat Petey was crying at my feet the whole time. I took him outside, he didn't go to the bathroom. I gave him water, he didn't drink it. I didn't know what his problem was, so I picked his ass up and threw him on the counter in front of me. Love. He wanted LOVE. SO I drew on a blue eyebrow (you can see it on the upper right) and said "F IT" and let my dog lay his pee pee down right where I cook dinner. (The counter has since been disinfected since before I made chili.)

Petey Baby

The next few days shall be busy! I bought fabric for the chevron quilt I am going to attempt to start cutting tomorrow. I also need to make a decision on these unfinished throw pillows I have. My sewing machine is not cooperating in the ruffling department!