Showing posts with label make ya own ish. Show all posts

Sunday, April 21, 2013

DIY: Retro Bikini from no pattern

Let me start off by saying, I was born in the wrong decade. Don't get me wrong, I love my life now, and my iPhone, and couldn't imagine it any differently, but sometimes, I just wish I was a lady of the 50's. Everything was so classy then. Dressing up to go to the movies, going on a plane, dinner dates, powdering your nose. It was a beautiful time, and I'm always drawn to anything from that era. Pyrex, winged tipped oxfords, sweater guards, I love it all.

If you have a Pinterest account, you've no doubt come across those adorable pins for retro bikinis. I know I have. I always click on them with the desire to purchase the most adorable retro bathing suit, to find out that they seem to ALWAYS come with a $200 price tag. I've had an idea to make my own bathing suit in my head for some time. I didn't have a pattern, I hate patterns. My ass and hips aren't anywhere NEAR the same measurement. I am a petite person, but I can guarantee you that my ass is not, so patterns are so frustrating for me to work with.

I took a sewing class last year in Oceanside and the teacher encouraged us to go home, rip up our favorite outfits, and make a pattern out of them and recreate these garments. While I'm not down with ripping my favorite Bettie Page dresses apart, I was intrigued by the idea.

So, I decided to drive over a hour to the nearest legit fabric store, and dive into my project...

Here is everything that I did, with explanations which I hope encourage you to make your own!

Supplies Needed:
-1 full yard of bathing suit material (just to be safe! I did 1/2 a yard of two colors)
-1 full yard of bathing suit lining (it's usually in the same section, it's not pictured, but it's beige)
-4 buttons
-Large graph print paper from a fabric store (to make your pattern)

Step 1: Find your suit!
-So, this isn't my favorite bathing suit, it was one of the ones I own with the most coverage, and could untie. I did cut up another bathing suit, but this one had a nicer shape, so I went with this one.
-As you can see near the crotch area (hehe) there is an "+" this is where my crotch seam met the butt seam, it's also where it fits me directly in the middle of my nether regions, so I made that the "middle" of my bathing suit. This bathing suit is made up out of one piece, and I sewed it together at the sides. It's literally based on the idea of a diaper, doesn't that sound SO attractive!
-I measured myself from my nether regions up and decided that 12 inches was enough room for me to get a high waisted look. I wanted the bathing suit to hit me right below my belly button, but you can make it higher, it's just really up to you on what you'd like. So that's what the _ line at the top and bottom are, that is 12 inches from my middle area, to my stomach, and my back. (I'm about 5'3)

Step 2: Trace your bottoms
-I traced the bathing suit exactly, so I could see the shape of the bottoms. It looks like a giant diaper doesn't it?


Step 3: Measure your waist
-My waist is 26" so I made two 13 inch lines, one for the top, one for the bottom, this will be my waistband.


Step Four: Create YOUR bikini!
I just went with this and did what I thought was good. You'll notice, it's a little lopsided on the right, that's okay, with sewing, you can ALWAYS take things in. I made this a little larger than I thought I would wear because I'd rather have to make it smaller, than need it bigger.


Step Five: Cut your pattern out WITH SEAM ALLOWANCE
-I've gotten pretty good at eying what an inch is, so please allow yourself an inch, and measure if you have to! You do not want to sew close to the edges of a bathing suit, I'll explain why, but give yourself an inch, you can always trim the edges later!


Step Six: Cut out your bikini bottom fabric
-I'm always worried about making things too small because I did that once with a custom skirt, so I'm forever haunted. You'll notice, I cut the bikini material from the pattern, then the lining is from the bikini material...


Step 7: Cut out your lining
-Unless you want to be rockin' a MEAN OLD camel toe at the beach, you NEED lining. Use your bikini material as the pattern for this one so it comes out evenly.


Step 8: Pin lining and Bikini Bottom together
-So, with the right sides of the fabric facing each other, sew along all four sides of the material, stopping close to any end so that you can turn it right side out.
-It's not pictured, but after I sewed around all sides, flipped it inside out, I stitched it closed, and then went around all the seams with a straight stitch, that's optional, I really don't think it did anything for my suit...I just wanted a more fancy trim.

Step 9: Sew
-ZIG ZAG, I'm pretty sure every basic machine comes with a zig zag stitch nowadays, I also used a special needle for sewing knits and stretches, you can find those in the needle section, but honestly, I think these are a gimmick!


Step 10 (Not Pictured) - Sew the sides together
-I sewed and re sewed these bottoms about 5 times to get them to where I wanted. Keep trying them on and pinning them to adjust the sizing, that's what makes them custom! Just sew the sides together (where your hips are) with the right side of fabric together to attach them together.
- I also sewed on the buttons, my pretty anchor ones were too small, but I'm happy that I had these other retro ones lying around to use.

Step 11:Find your top
-I wanted a bandeau style, so I pulled out one that fit well. Trace it out just like the bikini bottoms, don't forget your seam allowance!


Step 12: Cut out Bikini Top Fabric
-As you can see, I made mine into a sweetheart shape, I just wanted it to be a little more fitted than the one I had.


Step 13: Pin right side of bikini top and lining together
-Sew around the top and bottom (NOT THE SIDES)
-Optional - I bought bra cups, and put them in here to give my boobies some shape, I tried the top on without them, and it looked just fine, but I think the bra cups help keep it up.


Step 14: Creating Sides
-I didn't copy a pattern on this one. I just made it based on what I thought would look good. On the edges, this is the same width as the top, and the bottom is skinnier because I don't have a clasp, so I am going to tie it together.
- I sewed around three sides, turned it inside out, and sewed the end bit closed.
-Then I just attached it to the bra piece with the right sides facing together. (Like the bottoms)

annnddddd you're done! I didn't include directions on how to do the bow, because it's extremely easy, and if you have sewn anything, you've sewn a bow before, I'm sure! :)

My husband is in Florida for 3 weeks of training, so this is the best picture I could get by myself! : )
BAM!

And now I am sunbathing on our porch, refusing to take it off.


What I learned from making my own bikini.

1. Patience is a virtue. I wasn't kidding when I said I sewed these bottoms probably 5 times. What I mean is, that I kept making the crotch area smaller so that it didn't bunch up. I would go in about 1/4" every time, because I didn't want to make it too small. This was a great idea, because the final time I sewed it, if I would have done more than 1/4" it would have been too small in that area!

2. A one inch seam allowance is perfect! If you sew too close to the edges, with a zig zag stich on bathing suit material, it bunches. It's really hard to explain, but I played with the fabric before I sewed with it. If you've seen those scrunch bottom bikinis, that are sort of curly and wavey at the ends, that's what it does to the fabric when you sew close to the edges. By sewing close to the end of the seam, it won't lay flat, it will curl up at the ends.

3. Stretch the Fabric! I know that is going against every knit cardinal rule you've ever heard of, but it's true. This is NOT a knit material, if anything, this material is your ENEMY. If I didn't stretch the material when I was sewing, it would have taken over my sewing machine, and conquered my life! 

4. Don't give up! It was hard, but I stuck with it, and I am so happy with the results!


Thursday, March 21, 2013

DIY Rustic Headboard

We recently bought an extra bed since my fam-damily is visiting, and I was disturbed at the prices of headboards and furniture sets. Half the stuff I saw was hideous, and the other half was all boat themed. For some reason here the decor and furniture is all shore themed, we even have a furniture store called "Shore Decor" here, YIKES! Personally, the whole nautical theme is overdone to me, and this is coming from a girl who has anchors in every room. ;)

So, I did some googling, talked it over with the husband, and came up with this bad boy, who only cost us a whopping $18.

Relax girlfran

And here's how you make it!

Supplies Needed:

-4 boards (Ours is 48 inches L, 24 inches H - boards are 48"x6")
-8 Screws & Electric Screwdriver
-Scrap wood to attach to the back (the picture later will make more sense
-Oil based stain of your choosing, I used this one - a true "barnwood" stain I think!
-Sponge for Stain
-Brush & Polystain (Optional)
-Gloves
-Circular Hooks for hanging (see picture)
-Gorilla Hooks

Step One:
Get your supplies. We bought everything at Lowes


Step 2:
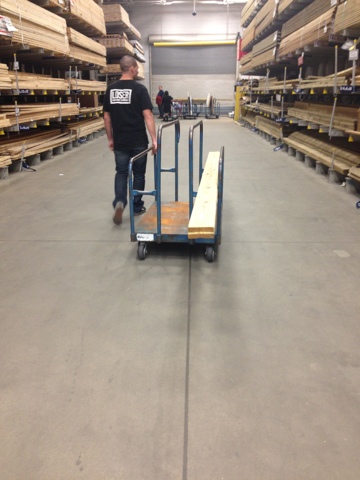
-Cut the boards, or get them cut at your local store. You can actually have Lowes cut your wood for you, which is why I didn't include a saw in the supplies needed, we have a saw, and in this case, we bought larger boards and had them cut into 3 at the store, and used the leftover ends for the backing.
-As you can see we have 4 boards because the bed in the picture is a full. If you want to make a headboard for a larger bed, just measure 1 inch on both sides, and adjust your measurements
-Each board is screwed in twice (once on each side) to the backwood pieces, I suggest using the black screws, I think they look better with the stain


Step 3: Distress Wood
-When you stain wood, you'll notice if there is an indent in the wood, or a scratch, it holds the stain darker, since I wanted a rustic look, we went to town on this board. As you can see, thats my lovely husband hitting the board with a military issued Kaa-bar. Yay Marines!
-You can use anything really, most people use a chain, but I didn't have one, so we used the metal end of a dog leash, a big long metal thing that turns the sprinklers on, and the kaa-bar.
-Go hog wild, and beat that board down.

Step 4: Stain
-Get your stain on.
-Staining is pretty simple to me, so I didn't take any progress pictures. You can see in this picture the sponge I used, and how I kept the stain all to one side of the sponge. Don't get that thing soaking wet, and always brush with the grain of the wood.
-I always stain the creases and then go back over
-The more stain you use, the darker it will be, if you like the stain I used, this is one coat of this

Step 5: Not Pictured
-Sanding and Polyurethane top coat (Optional)
-What had happened was, my husband left my paddle board directly next to my lovely project, and it fell over, knocked the can of stain, and it splashed onto the wood ruining my lovely headboard. I was so upset. So we tried to sand it out, and ended up loving the way it looked. You should always sand it slightly before the poly coat anyways, but if you want to do it exactly like me, just sand it pretty good in random places to get it more weathered.
-If you're the type of person that doesn't like the unfinished wood look, sand it slightly, and then apply a polyurethane base twice (directions on the product)

Step 6: Hanging
-Here is an example of the hooks we used, we hang everything in our house with those gorilla hooks. They're amazing, and bizarre. I think they used to be called Hercules hooks? Anyways, we have heavy windows, pallets, etc. etc. in our house, and they're all hung just like this! But be careful, studs in the walls are gorilla hooks enemy!


TA DA, You have a fab new headboard for cheap cheap cheap!

I hope you're digging those sheets and pillows as much as I am. I made the shams, quilt, and Relax pillows all myself. This is a handmade house!

Here are some closer up pictures of the stain, the wood, and how it looks hanging up against the bed.


I hung the wood slightly lower than the mattress top because I didn't want my guests banging their head on the wood above them.

Isn't this a beautiful stain?

I am so happy with the finished product, and it's only nearly 1 week until my family gets to experience it all. My older sister has been threatening me that she's taking my brand new quilt (which I've yet to blog about, sorry!) home with her! That quilt had over 10 hours of free motion quilting on it. It's never leaving my hands, ever! 

Sunday, March 3, 2013

Hobby Lobby ain't got nothin' on this girl!

When I first found out I was moving to North Carolina, I was excited for crafting possibilities! In the south, they have Hobby Lobbys! Now, HL's are now slowly making their way out to California, but the nearest one to me was about an hour away when we still lived there.

So, we get our orders, I start googling everything that I love to see how close by it will be to our new house. And guess what I find out? There IS NO HOBBY LOBBY NEARBY. I was so sad. There wasn't even a Joanns, the nearest place that had fabric? Wallie World!! Which I hate and despise, and secretly sanitize my hands about 10 times when I am forced to go there. Fast forward to a few weeks later, and someone posted online that a Hobby Lobby was in fact opening near our new base. I was tap dancing on my table tops for weeks. Well, I found out about 3 months ago, and guess what?

Hobby Lobby opened last week!!!

If you've never been in a Hobby Lobby, try to think of it like if Michaels and Joanns had a threesome with Home Goods, and could produce offspring, that offspring would be Hobby Lobby. It has fabric, crafts, furniture, decor, etc. etc. It's seriously amazing, and seriously overwhelming. I forgot how hideous some of the stuff there can be. There is one aisle in particular that I've deemed "baby hooker" where everything is hot pink, zebra print, and feathery. Not cute.

Anyways, I went opening day, and bought a ton of stuff. I went up and down every aisle, and just liked to look around at what they had. One thing in particular, caught my eye. It was a piece of old wood that had some wrought iron decor mounted onto it. I seriously considered buying it for $100, but I thought, screw that, I can make that!

I wish I would have taken a picture of it, but it looked something like this:

Anyways, the husband came and found me just as I was pondering the metal decor, and I asked him if he thought that we could make something similar, and he said of course. That man is always up for a challenge, even a crafting challenge! So, we went through the metal aisle, and found one that we liked, and since it was their opening day sale, we got one 50% off and ended up spending an entire 7 dollars on this project!

On our way home, I was staring down the roads trying to find a good pallet. Weathered pallets are hard to find. Someone once told me they get theirs from the backs of stores, but those are just too new, too wood looking. So we are driving along the "freeway" here, and I see an abandoned field next to a church and scream for Guido to pull over.

We had hit the jackpot. There are old white picket fences, bricks, and various sizes of pallets that have been there for what seems like forever. We picked out an extra long one that I haven't seen before, usually they're pretty square, this was one totally rectangular. We grabbed it, and took off before the 5-0 showed up, because honestly, we have no idea whose property we were on.


We removed the pallets from their backing, and actually attached them to some leftover wood. To get the pallets off what originally holds them together, just hit them with a hammer against the opposite side. Usually they pop right off, this one was a little hard because it was seriously weathered.


We attached them to three different pieces of wood. Originally, I wanted to reuse the nails, but this wood was messed up, so we had to add some of our own screws into the new wood we had left over.


We hung up the pallet, and once we thought it looked level, we took it back down, and added the metal piece.

Finished Product

I am so happy with how it turned out. My house is already pretty much completely decorated, except for our master bedroom. No one goes in there but us, so there is literally nothing on the walls. This is the only thing on our walls right now. My mission is to spruce up that place! We have family visiting very soon, so I need to get my ass in gear!

Anyways, I hope you enjoyed my Hobby Lobby inspiration, not bad for only 7 dollas!