Showing posts with label crafty bitchy. Show all posts

Wednesday, March 27, 2013

DIY - Sugar Skull Ceramic Pot

I'm not going to lie...I saw this pin on Pinterest, and thought it was adorable. So I decided to make my own! It was actually fairly easy. I thought it was going to be a nightmare because I do not have a steady hand with a paintbrush, at all.

What you need:
-Ceramic Pot
-White Spray Paint & a clear topcoat
-Pencil
-Acrylic Paint and Brushes
-Plant and potting soil

I have a lot of this stuff already because I am a crafting hoarder, but if you wanted to make everything, you could go to Wallie World and probs pick up the whole deal for 10 bucks. Seriously. Depending on the amount of colors you want to use, I already had all those colors...

So...

Step One - Not Pictured:
-Spray paint your entire pot white, this took me a few days because I was in and out of the house, and my husband is a spray can nazi. He would only let me gently mist the thing, and it literally took DAYS to get the ceramic orangey color to not show up!

Step Two: 
-Draw your sugar skull with a pencil
-You'll notice I made some mistakes along the way, but I left them because I was going to cover them with black anyways
-The best thing about this project was that I could erase! I erased that damn mustache about 20 times before I got it the way I wanted.
-Also, if you don't feel like making up your own like I did, print one of these out and trace it onto your pot by pressing hard, but gently with a pencil


Step Three:
-Paint!
-I used the smallest brushes EVER for this project, and went slow. I think that's what helped make this project not look like shit. Of course, always start with the light colors first. Here I bounced from yellow to black because I was waiting for the yellow to dry before I added the red.
-I also used the back of a brush for all the dots. I did draw them so I knew where I wanted them, but I just simply dabbed the back of the brush into the paint, and went around the eyes, super easy, and it didn't glob up. Acrylic paint is the shit!


Step Four (Not Pictured)
-Clear coat, so that when you're watering your plant, your sugar skulls face doesn't melt off!
-Slap your plant in!

Step Five: Display
-And enjoy! : )


I might make some more, but I need to check myself, because I can get easily obsessed with something, and then go ape shit crazy and make like 12 for my house... Coughbuntingflagscough

Where art thou Gidgie?

I have been extremely busy lately getting my house ready for my family to visit. I'm a bit of a perfectionist, so I've been patrolling Craven County for the best curtains, home decor etc. etc. So, I've been everywhere, but on here. I have been crafting, but I've recently becoming much busier than I was before, if you know me personally, you know why I don't have time to sit around and craft all day anymore. Sadly. :(

But! I did promise to talk about the quilt I made, and I sat and tried to come up with a pattern for this quilt, I really did. I could do it, but it makes me look like an idiot. Seriously. I was drawing it out on graph paper, and just thought, wow. People are going to question your crafting abilities, and maybe your mental state if you post this. So if you really really really want a pattern, let me know and I'll email it to you, so I'm not embarrassing myself with my horrible excel and graph paper skills..

Anyways, here are some pictures of the quilt in my extra bedroom and the process. I'm still having mixed feelings about it, I'm not sure if I love it, or if the colors are a little too, I don't know, off? I think once the room is finally put together, it will all tie together nicely.

I used these 5 prints, that top bright one is the quilt back. All of these fabrics I bought at Joanns on Veterans Day last year, for 50% off, 
so I've had this idea in my head for awhile! 

I always lay out my quilts before I sew them together. You'll notice that the quilt got bigger because my husband kept telling me it was too small, so I kept adding on columns and columns! The little squares are 3"x3", the bigger squares are 6"x6" and the green rectangles are all 3"Wx6"L.

I ended up with: 
*9 - Little Square/Rectangle Columns
*8 - Big Square/Rectangle Columns
*Borders

I find that the easiest way to make a quilt is to sew the columns first. So I assembled anything vertically first (for some reason I always confuse the meaning of rows and columns.) So, I sewed the pieces in column 1 first, then labeled it some masking tape, then moved on to column 2, and so on. After all the individual columns are sewn together, I sew them together. So 1 with 2, 3, with 4, and so on. Then I sew the bigger pieces again, 1&2 with 3&4, if you've ever worked with a large quilt, this helps with the handling! 

I hope this helps anyone who wants to sew a quilt because it makes it go by SO fast. Now that I'm better at sewing and assembling, I look back on my first quilt and laugh at my self. I think I've realize why that quilt took something crazy, like over 24 hours to make.

I always buy way more fabric than necessary. So I had some extra little squares, so I decided to sew them together around the outside for a border. I originally wanted 2 borders, but I ended up almost not being able to use the backing sheet!

I ended up with:
-28 Squares sewn together for the columns
-25 squares sewn together for the rows

Now that I'm done with this quilt, it would have been a much smarter decision to add on the border squares to the actual quilt. I wish I would have sewn them on with the columns from the beginning, that way, when I finished the quilt, I would have been done with the border as well.

I hadn't finished the pressing the bottom of the quilt when I laid this one out, so look at what a difference ironing makes! I always thought ironing wasn't that big of a deal, but I pressed the crap out of this quilt!


I also got a new attachment for my sewing machine! I ordered this free range motion quilting attachment for my simple Brother machine, and it worked perfectly! I was a little scared at first, so I practiced on a piece of scrap fabric. It's really hard to get used to, because the faster you go, the smoother the lines are, but you can't move too fast, or everything gets messed up.

I also used two entire spools of fabric on this bad boy, and did I mention this part of the quilting process took me 10 hours??


I will never be able to make a quilt again without "quilting" the whole thing. This one feels like an actual quilt, it's surprising how much sturdier it seems. I need for it to sit in the wash with some downy for a while so that it gets soft. It takes so long to break quilts in!

Of course I forced my husband into the woods near our house for a picture, I was too short to show the finished product! Here is the top!
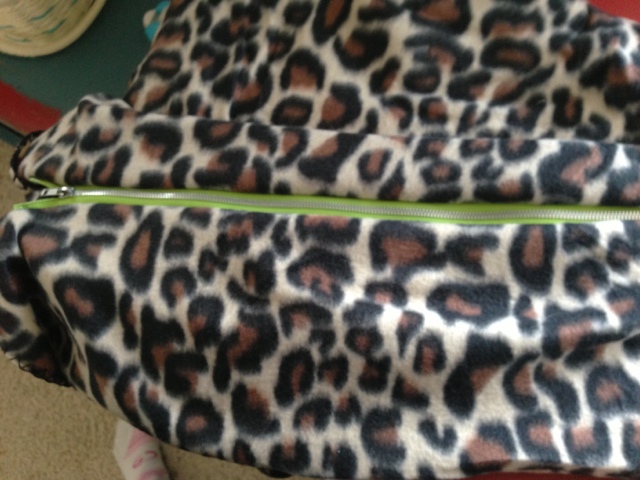
Backing

Someone on my Instagram said this is a super hero quilting pose. It sure is! My back was sore for days slapping this bad boy together!

Overall, this quilt was fun. I learned so much, just by having to figure ish out on my own. I hope my guests like it as much as I do!

Wednesday, January 30, 2013

Dwight, get out of my nook!

That's what she said! That's what she said! If you know what this is from, you get two thumbs up from this girl!

I, the librarians daughter, have created a reading nook. 

When we first looked at this house, I loved it, but I kept thinking, "What the hell am I going to do with THAT area?" "THAT area" was the formal dining room. I don't understand formal dining rooms. They must get used what, three times a year? I understand some people like big, giant dining room tables to sit and enjoy a meal with their family. But for me, I would get so much more use out of a reading nook. There is nothing more that I love in this world, than a good book. Okay... maybe Petey, but books are a close second, my husband is third. ;)

This reading nook opens up into our living room so I couldn't go too crazy with the color scheme. My living room is pretty dark, with reds, and burnt oranges, so I thought brown would be a great color in the nook, and then that vintagey mustard color to make it pop a bit. I am so happy with the results, here is a looksie!

The anchor pallet I made, finally found a home. I also made that pillow, I painted canvas and sewed it into a pillow. There will be a tutorial later because 
I'm making a few for friends.

Other side of the nook

Other side of the nook, my grandmothers sewing machine on display

I've mentioned this on my FB and Instagram, but my husband has challenged me to "30 Days of Vegan." We are going to give it a try the day after the SuperBowl because let's face it, I want to chow like a pig. So we are going to give it a shot, with one break for the weekend that we're visiting my brother and his family. If you know my brother, Ethan, you'll know he won't stand for fussy eating. If I told him I could only eat Vegan, I'd wake up with a chicken wing stuffed into my mouth while I was sleeping!

So, I tried this salsa recipe off Pinterest and sweet mother, Mary of God! It was so good!!! I made it yesterday, but let it sit overnight in this super cute 70s mushroom Pyrex dish, and I ate it with my husband tonight while I cooked some chili, soon to be vegetarian chili! The salsa is so good that I'm making two servings of it for the marines on Sunday. I bought all organic ingredients too! I finally found what I think is the North Carolina version of Whole Foods - Harris Teeter. It's my new favorite store, I've already been there twice this week and it's 25 minutes away... I also bought those bright raspberries in my red Pyrex dish there as well. I love that Pyrex dish, because well, three Asian ladies were at the flea market debating about buying it for 5 minutes, and then I finally swooped in and took them out from underneath their noses and bought them.

I was making my Target list today, and fat Petey was crying at my feet the whole time. I took him outside, he didn't go to the bathroom. I gave him water, he didn't drink it. I didn't know what his problem was, so I picked his ass up and threw him on the counter in front of me. Love. He wanted LOVE. SO I drew on a blue eyebrow (you can see it on the upper right) and said "F IT" and let my dog lay his pee pee down right where I cook dinner. (The counter has since been disinfected since before I made chili.)

Petey Baby

The next few days shall be busy! I bought fabric for the chevron quilt I am going to attempt to start cutting tomorrow. I also need to make a decision on these unfinished throw pillows I have. My sewing machine is not cooperating in the ruffling department! 

Wednesday, January 23, 2013

Dog Bed Tutorial

{If you don't want to listen to me gush about my pets, and just want the tutorial, scroll down to the picture of the supplies needed}

I think it's time to talk about my pets. I am one of those weird people that is obsessively in love with their dogs, and is disturbed whenever I find out that others don't love their pets as much as I love mine. These dogs are my babies, my children, my companions. When my husband was gone all the time, it made it easier to come home to an empty house. There were and still are two little tails/nuggets wiggling and wagging when I came through the door.

I got Petey for my 16th birthday. I saw him and sobbed hysterically until my parents bought him for me, little did I know then, that he would end up being the largest Shih-Tzu anyone has ever seen. Smokey has a sweeter story, my husband wanted another dog because apparently it's not manly to be seen walking a Shih-Tzu in public alone. We really wanted an Australian Cattle Dog because I had one when I was younger, and they're just neat dogs. We went online and found one in the shelter, it was Smokey. He is the sweetest dog anyone has ever met.

Petey  & Smokey

Which leads me to this post. My dogs are divas to the extreme, our Oceanside home was all wooden floors, and they don't ever sleep on the floor, so I made sure that we had a dog bed in every room of the house. Well we we moved I tossed them all out, so even though our new house is half wood/half carpet (which I LOVE) my dogs are still used to beds, and refuse to sleep on the bare floor. This leads to them trying to sleep in our bed, or on our couch, or on the pair of pajama pants left on the floor.

We went on a mission when we first got here to find a dog bed, and we bought this teeny one from a cute little local pet store...FOR THIRTY BUCKS! I was in shock, it wasn't even one that I could wash, it had built in foam into it! YUCK! I looked at a few dog beds while I was at the store, and decided to make my own. I made one a few weeks ago and posted about it on Instagram, but I finally made another one with a zipper which is fabulous because I can unzip it and wash it!

So - here is the tutorial! Please let me know if you think anything isn't clear.

Tools Needed
-Scissors
-Thread
-Sewing Machine
-Pins

Time
-New Sewer - 1 Hour
-Old Sewer - 30 mins.

Supplies Needed
-3 Regular Sized Pillows 
- 1 50" x 60" throw
-1 24 inch zipper
(I bought all of this for $8.50 at Walmart, each pillow was $2.50, 
and the throw was on the clearance rack for $1 - I already had the zipper)


Step One: 
Fold the throw in half hotdog style, and find the placement for your zipper. I choose the side because it will be up against our TV stand, so the zipper will be hidden here. You need such a giant zipper because you're going to have to stuff it with pillows.

Step Two:
Pin the zipper down, and attach the zipper on one side. I did not include a how to on the zipper part because I felt that it would make this tutorial crazy long. But, don't hate me yet, I used THIS VIDEO TUTORIAL to learn how to do a zipper when I first bought my sewing machine. I suggest going to that tutorial and watching the video before attaching your zipper, but do not fear, zippers are easy than they appear!

Step Three
After you have attached one side of the zipper, do the other side!

TADAAAA You have a beautiful zipper!

Do not worry, we will fix this bad boy later - I wanted my zipper centered, so I have this little gap on both sides.

Step Four
-Once you have installed the zipper, open up the zipper half way. What we are going to do is sew around the entire outside of the blanket, and then flip it out so the "right" side will be outside, and your ugly seam will be hidden from the world. If you do not unzip your zipper halfway, you will sew your beautiful dog bed all the way closed and have to try to unzip it from the outside. Trust me, NOT FUN.

Step Five
-Time to sew around the outside (marked with washi tape) the left side is folded so we only have to sew a little bit.The folded fabric should have the right sides facing the inside, and the wrong sides should be on the outside (what you see.) Same thing with the zipper, the wrong side of the zipper should be on the outside, the right side on the inside. Sew around the outside at whatever seam allowance you want, I picked an inch because of the fleece fabric, and since it will be a pet bed, I want it to be hardy for my dogs. If you're using flannel, I'd recommend an inch seam allowance as well.

Step Six
-Don't forget to do that baby part on the opposite side of the zipper. Just sew it at the same seam allowance you used for your zipper. I used washi tape to mark how much length I had to sew.

Here is what the bed looks like when you sew around the outside. Once you've sewn the bed closed, turn it inside out.

Step Seven
-Insert three pillows and zip that bad boy closed. You're done, you have a cute dog bed for the price of 3!


Happy Valentine's Day Smokey, don't you look so happy!

I applique stitched a heart on it to add some pizazz to the bed. Petey seems to dig it! It turns out to be a pretty big dog bed!