I think it's time to talk about my pets. I am one of those weird people that is obsessively in love with their dogs, and is disturbed whenever I find out that others don't love their pets as much as I love mine. These dogs are my babies, my children, my companions. When my husband was gone all the time, it made it easier to come home to an empty house. There were and still are two little tails/nuggets wiggling and wagging when I came through the door.
I got Petey for my 16th birthday. I saw him and sobbed hysterically until my parents bought him for me, little did I know then, that he would end up being the largest Shih-Tzu anyone has ever seen. Smokey has a sweeter story, my husband wanted another dog because apparently it's not manly to be seen walking a Shih-Tzu in public alone. We really wanted an Australian Cattle Dog because I had one when I was younger, and they're just neat dogs. We went online and found one in the shelter, it was Smokey. He is the sweetest dog anyone has ever met.
Petey & Smokey

Which leads me to this post. My dogs are divas to the extreme, our Oceanside home was all wooden floors, and they don't ever sleep on the floor, so I made sure that we had a dog bed in every room of the house. Well we we moved I tossed them all out, so even though our new house is half wood/half carpet (which I LOVE) my dogs are still used to beds, and refuse to sleep on the bare floor. This leads to them trying to sleep in our bed, or on our couch, or on the pair of pajama pants left on the floor.
We went on a mission when we first got here to find a dog bed, and we bought this teeny one from a cute little local pet store...FOR THIRTY BUCKS! I was in shock, it wasn't even one that I could wash, it had built in foam into it! YUCK! I looked at a few dog beds while I was at the store, and decided to make my own. I made one a few weeks ago and posted about it on Instagram, but I finally made another one with a zipper which is fabulous because I can unzip it and wash it!
So - here is the tutorial! Please let me know if you think anything isn't clear.
Tools Needed
-Scissors
-Thread
-Sewing Machine
-Pins
Time
-New Sewer - 1 Hour
-Old Sewer - 30 mins.
Supplies Needed
-3 Regular Sized Pillows
- 1 50" x 60" throw
-1 24 inch zipper
(I bought all of this for $8.50 at Walmart, each pillow was $2.50,
and the throw was on the clearance rack for $1 - I already had the zipper)


Fold the throw in half hotdog style, and find the placement for your zipper. I choose the side because it will be up against our TV stand, so the zipper will be hidden here. You need such a giant zipper because you're going to have to stuff it with pillows.

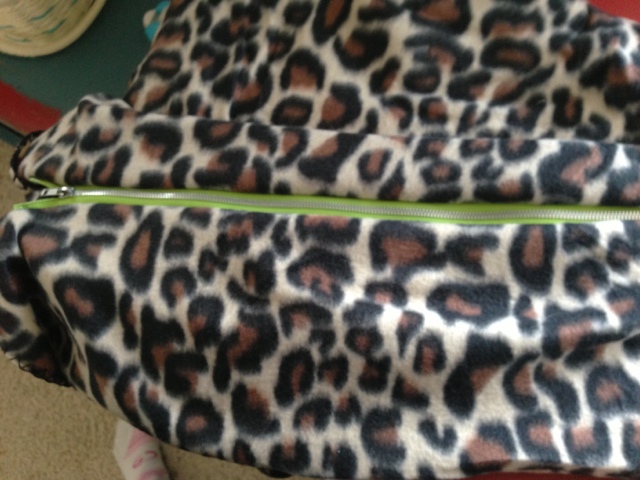
Pin the zipper down, and attach the zipper on one side. I did not include a how to on the zipper part because I felt that it would make this tutorial crazy long. But, don't hate me yet, I used THIS VIDEO TUTORIAL to learn how to do a zipper when I first bought my sewing machine. I suggest going to that tutorial and watching the video before attaching your zipper, but do not fear, zippers are easy than they appear!

After you have attached one side of the zipper, do the other side!


-Once you have installed the zipper, open up the zipper half way. What we are going to do is sew around the entire outside of the blanket, and then flip it out so the "right" side will be outside, and your ugly seam will be hidden from the world. If you do not unzip your zipper halfway, you will sew your beautiful dog bed all the way closed and have to try to unzip it from the outside. Trust me, NOT FUN.

-Time to sew around the outside (marked with washi tape) the left side is folded so we only have to sew a little bit.The folded fabric should have the right sides facing the inside, and the wrong sides should be on the outside (what you see.) Same thing with the zipper, the wrong side of the zipper should be on the outside, the right side on the inside. Sew around the outside at whatever seam allowance you want, I picked an inch because of the fleece fabric, and since it will be a pet bed, I want it to be hardy for my dogs. If you're using flannel, I'd recommend an inch seam allowance as well.

-Don't forget to do that baby part on the opposite side of the zipper. Just sew it at the same seam allowance you used for your zipper. I used washi tape to mark how much length I had to sew.


-Insert three pillows and zip that bad boy closed. You're done, you have a cute dog bed for the price of 3!
Happy Valentine's Day Smokey, don't you look so happy!

I applique stitched a heart on it to add some pizazz to the bed. Petey seems to dig it! It turns out to be a pretty big dog bed!

Thanks for the great tutorial!
ReplyDeleteYou are very welcome!
DeleteThis will be at the top of my list of things to make. Your tutorial is awesome!
ReplyDelete